<< >>

____________________________________________________________________________________________________________________________________________


Showing posts with label Boy Tutorial. Show all posts

Friday, June 14, 2013

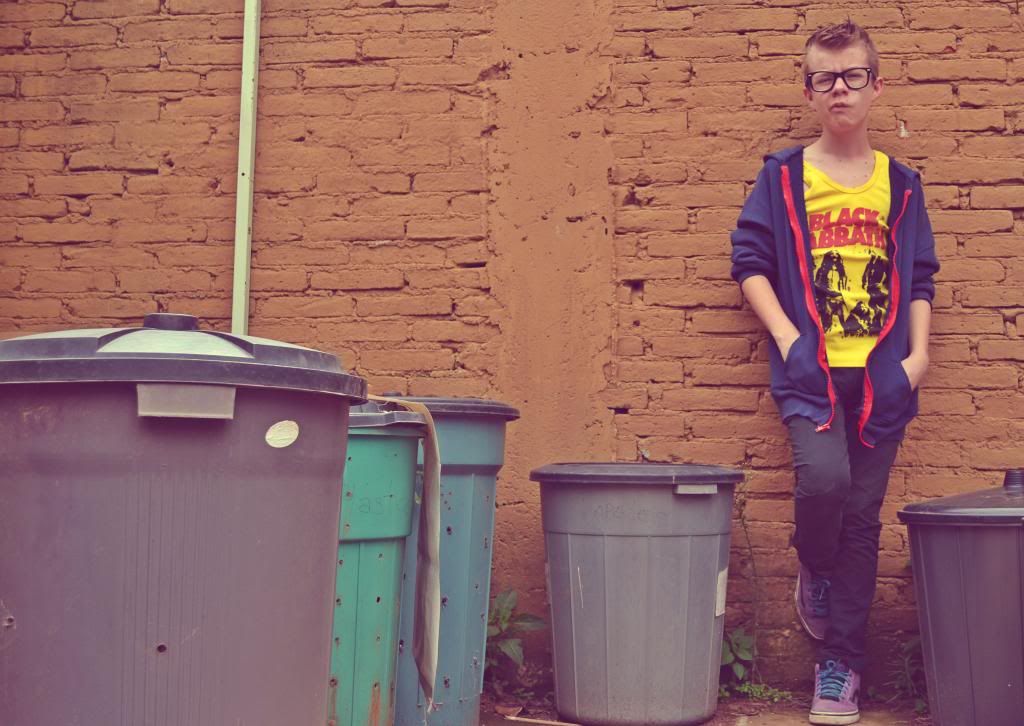
sweatshirt recyled / sudadera reciclada

 photo DSC_0008b_zps3453b3fb.jpg  photo DSC_0011b_zpsfecf8aff.jpg  photo DSC_0013b_zpsa999db01.jpg  photo DSC_0014b_zps50782a45.jpg  photo DSC_0017b_zps943ff1a4.jpg  photo DSC_0018c_zps6c98e0cf.jpg  photo DSC_0019b_zps30f50918.jpg  photo DSC_0022b_zpsbeb525c4.jpg  photo DSC_0024b_zpsbff1c9bb.jpg  photo DSC_0033b_zps3de948e4.jpg  photo DSC_0039b_zps0b66d629.jpg  photo DSC_0037b_zps86ff2106.jpg

what i did, step by step:
lo que hice, paso a paso:

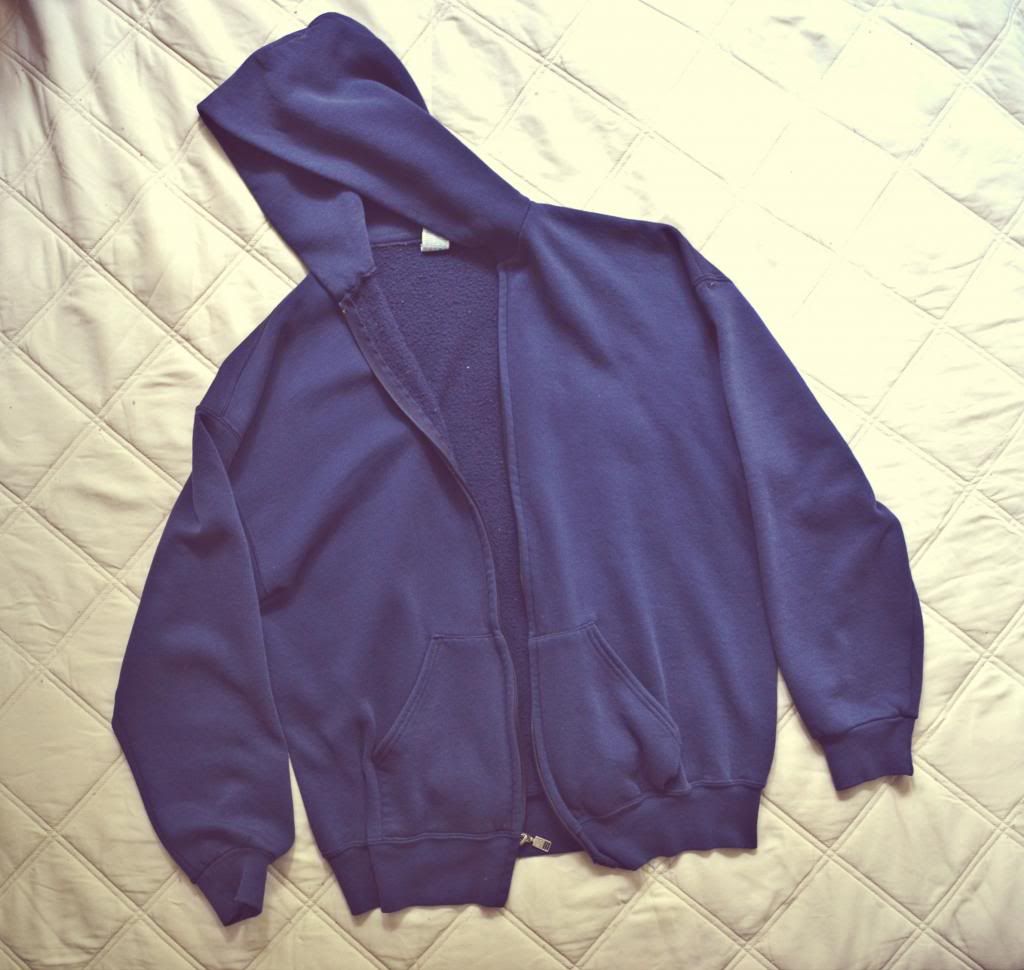
1. got my hands on a BIG old sweatshirt with a hoodie that had seen waay better days
1. conseguí una sudadera GRANDE con gorra al que ya se le había pasado sus días de gloria
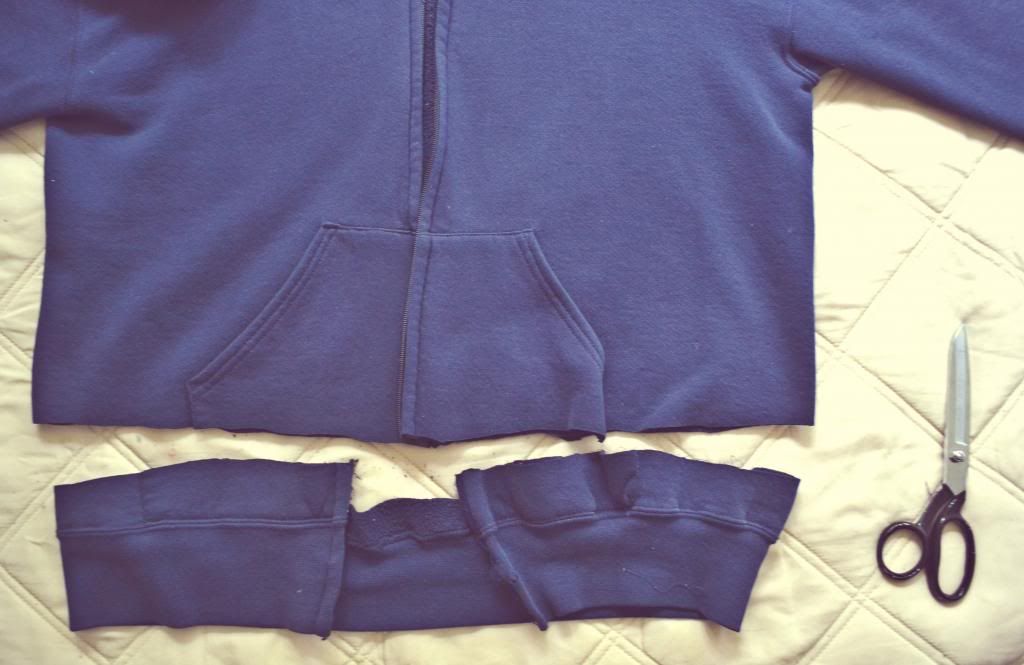
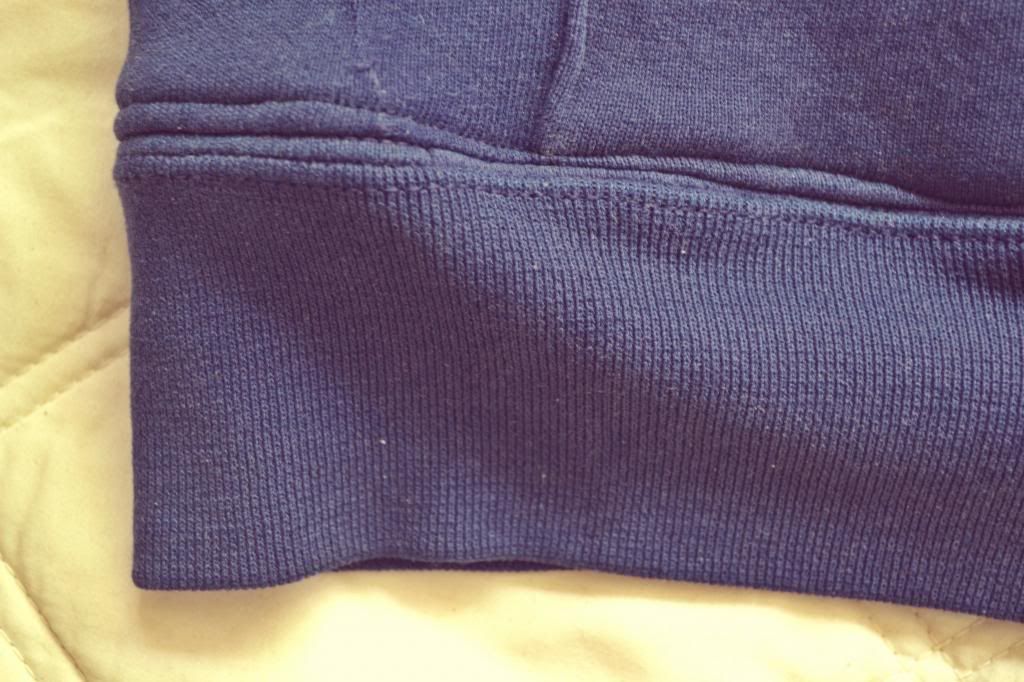
2. cut off the banded bottom and set aside (cut as far up as you need to achieve the length you´re going for); i unstitched the zipper as well
2. corté la cintura "elástica" y aparté (corta tan arriba como necesites para lograr el largo que estás buscando para tu sudadera); también descosí el cierre
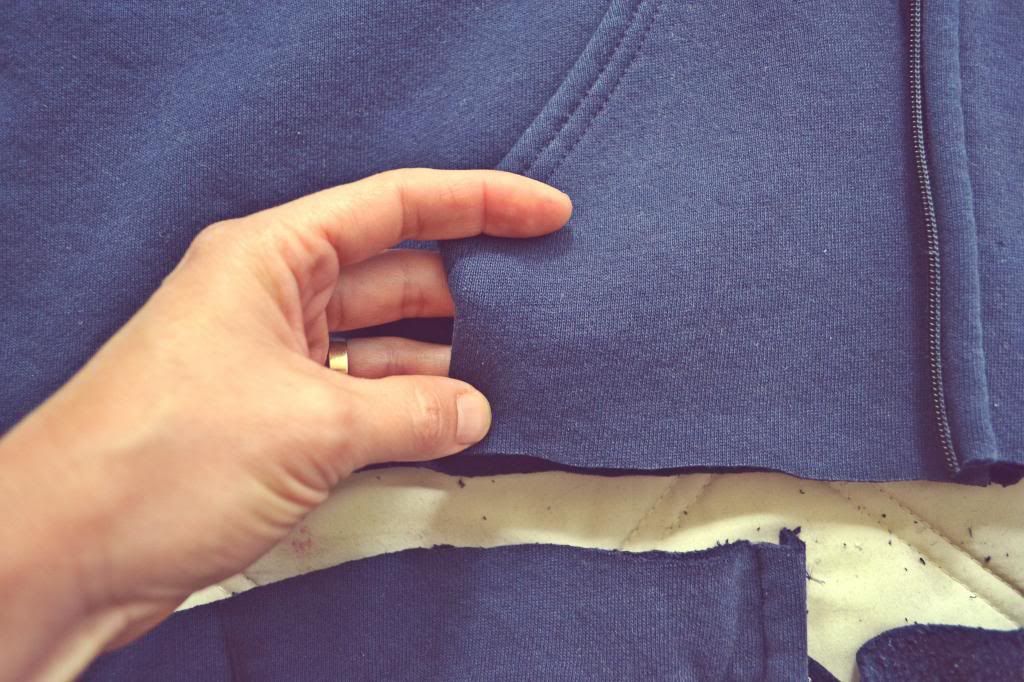
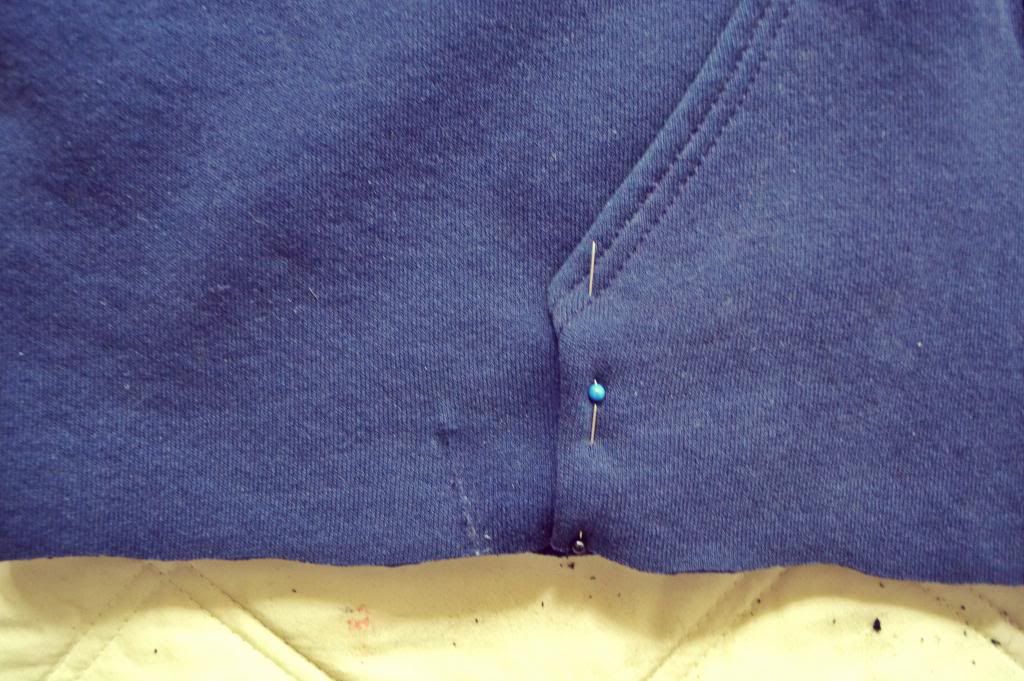
3. adjusted the pockets to fit the sweatshirt´s new size by folding the sides over, pinning and sewing 
3. ajusté los bolsillos al nuevo tamaño de la sudadera doblándo las orillas, fijando con alfileres y cosiendo
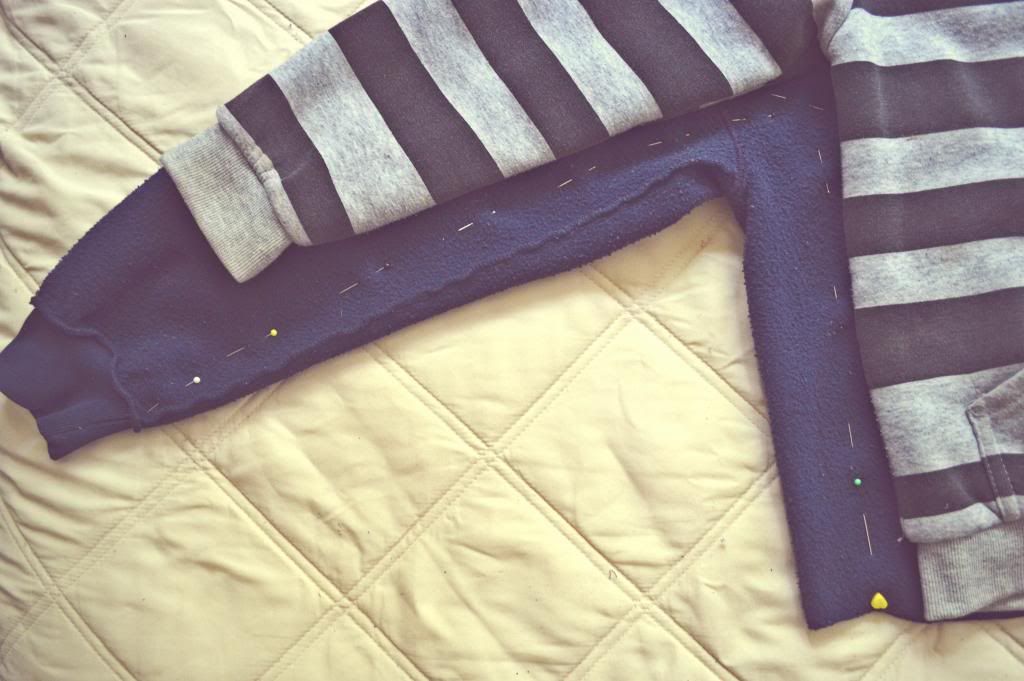
4. turned sweatshirt inside out, placed a sweatshirt that still fits G on top and, following the edge (+ a couple of inches), i pinned.
4. volteé la sudadera, coloqué una sudadera que aún le queda a G encima y, siguiendo las orillas (+ unos cuantos centimetros), sujeté con alfileres.
5. sew following the pins. i used a normal sewing machine without an overlock option, and sew in a straight line. this worked perfectly well with this sort of fabric because it´s stretchy, but not too much. i just pulled slightly on the fabric as i sew.
5. cosí siguiendo los alfileres. usé una máquina de coser normal, sin la opción de overlock y cosí en línea recta. esto funcionó a la perfección con este tipo de tela ya que es elástica, pero no demasiado. jalé ligeramente mientras iba cosiendo.
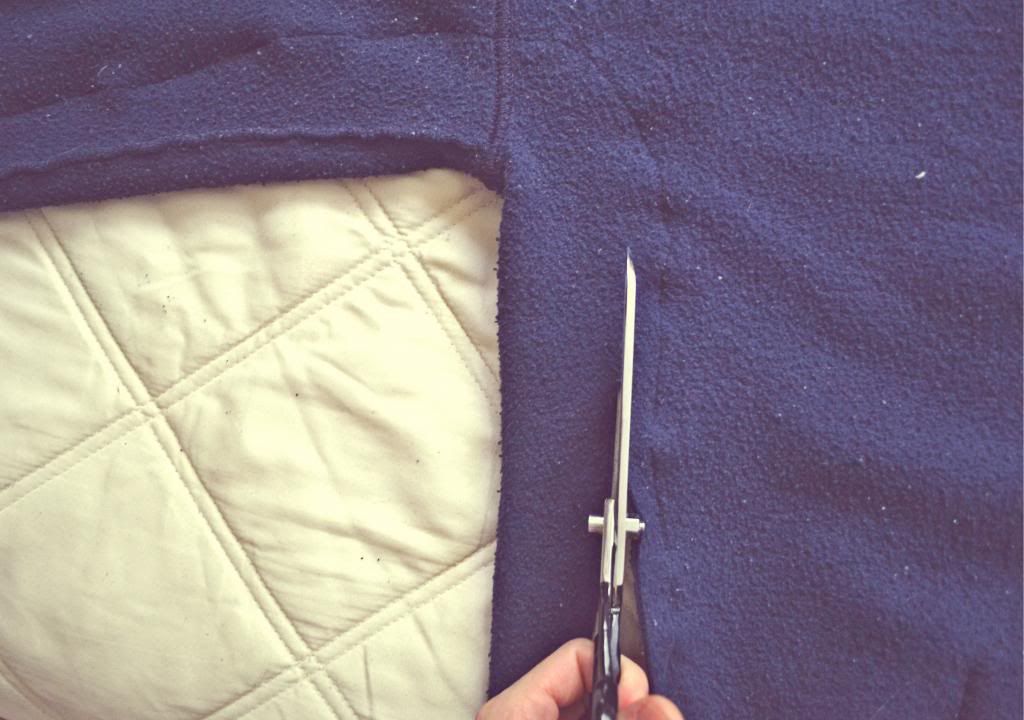
6. i cut off excess fabric
6. corté el exceso de tela
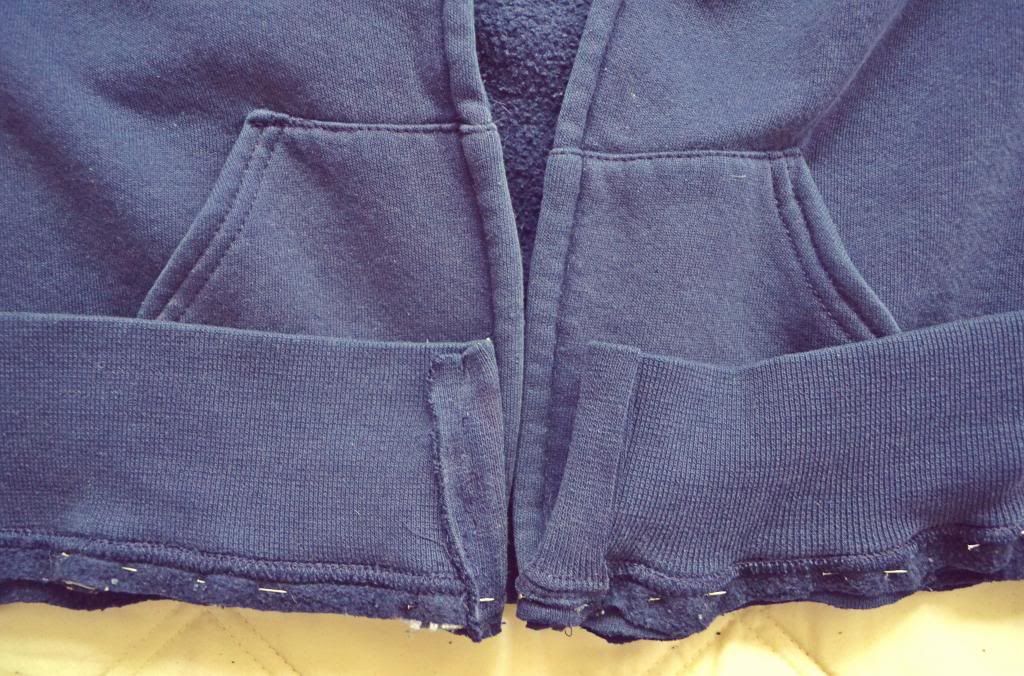
7. pinned banded bottom to the bottom of the sweatshirt, fronts facing (as shown in pic 8), and sew along the edge in a straight line, again slightly pulling as i went
7. fijé la cintura con alfileres al borde inferior, frente con frente (tal como muestra la foto 8), y cosí en línea recta a pocos centímetros de la orilla, nuevamente, jalé la tela ligeramente mientras iba cosiendo
8. optional: you can sew over the edges of the fabric left over from the banded area that was attached to the body of the sweatshirt. this will give it a better hold and add a more finished look (even if you sew as crooked as i do!) pic 9
8. opcional: puedes coser por encima del exceso de tela que quedó al unir la cintura al cuerpo de la sudadera. esto le aportará resistencia y le dará un mejor acabado (¡aunque cosas tan chueco como yo!) foto 9
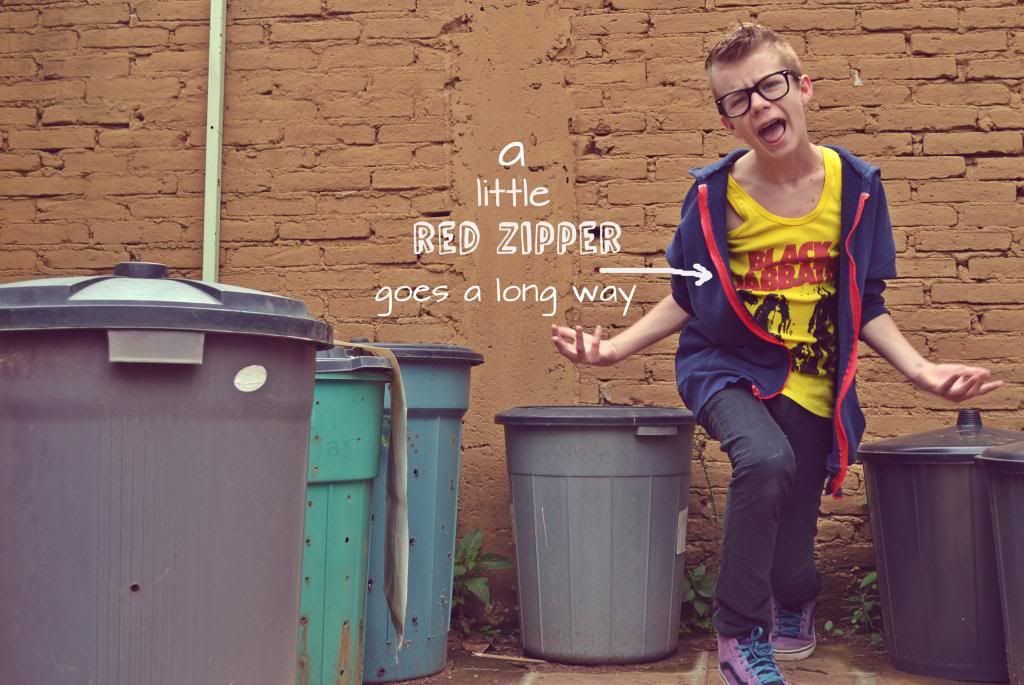
9. i sew on a new zipper in a contrasting color (shorter than the original one, of course)
9. cosí un cierre nuevo a la sudadera en un color contrastante (más corto que el cierre original, obviamente)
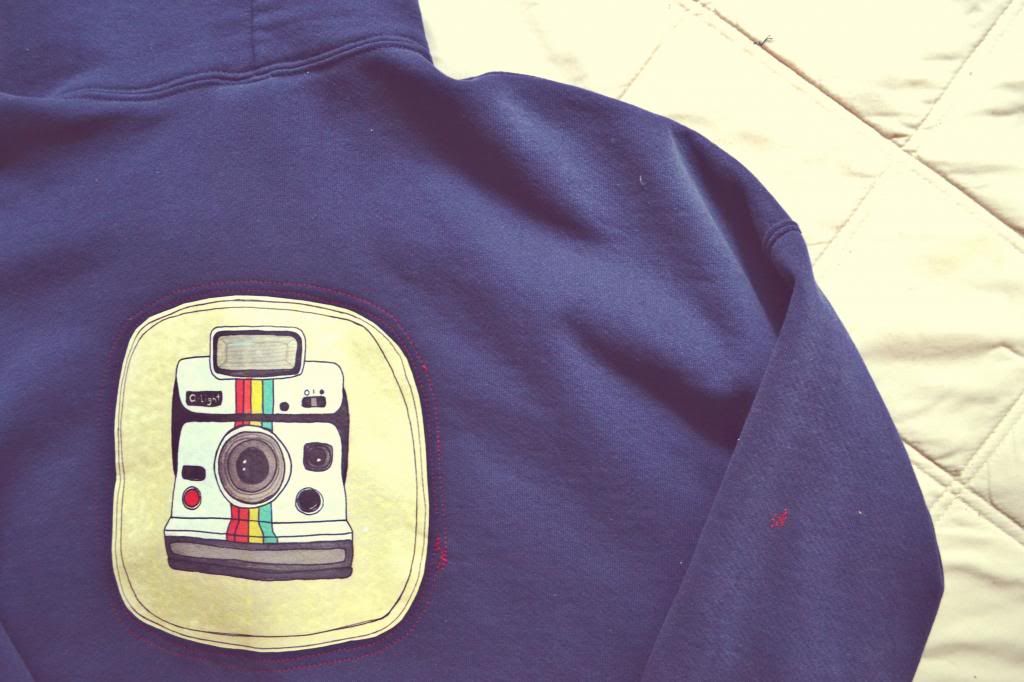
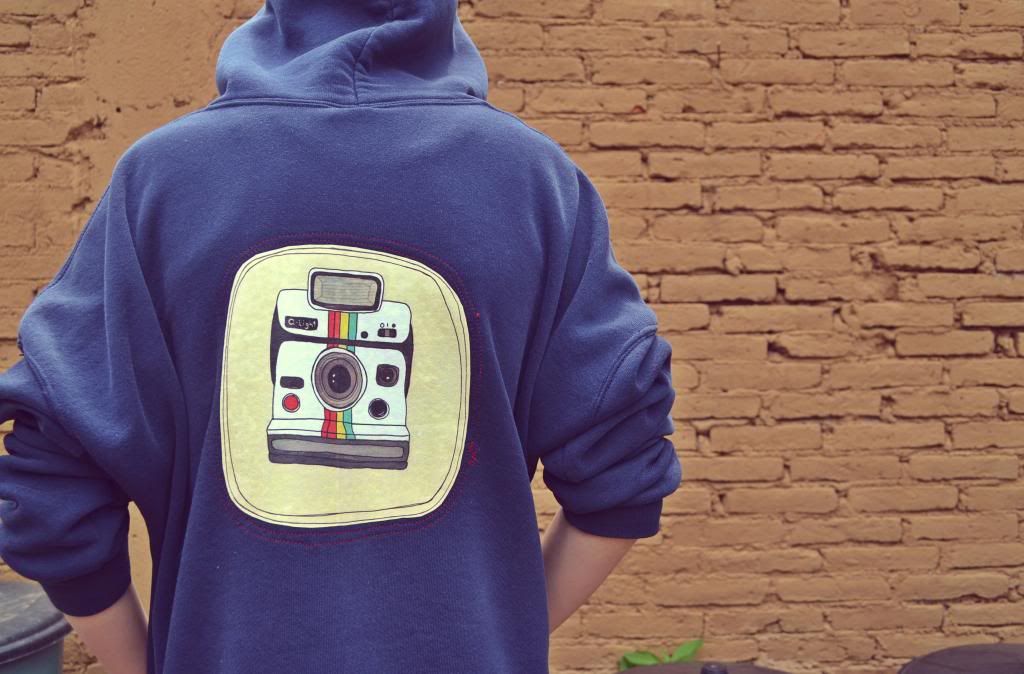
10. i ran out to the closest office-depot-thing-a-ma-jig i have in my area and printed out a fun polaroid illustration i found amoung big G´s favorite images on transfer paper, cut out and ironed it onto the back of the sweatshirt
10. salí corriendo al office-depot-como-se-llame más cercano a mi casa e imprimí sobre papel trasfer una divertida ilustración que encontré entre las imágenes preferidas de G, lo corté y planché a la parte de atrás de la sudadera
11. i then added extra stitches here and there in contrasting thread (around the image and hoodie for example)
11. finalmente añadí costuras decorativas en un color contrastante por aquí y por allá (por ejemplo, alrededor de la imagen, en el borde de la gorra...)

note: you might need to also adjust the length of the sleeves. i chose not to because it wasn´t as necessary for the look i was going for and the rate at which this boy is growing. if this isn´t your case, and you need shorter sleeves, then just cut off the banded cuffs and repeat steps 7 and 8 on sleeves.

nota: quizá necesites ajustar el largo de las mangas. yo escogí no hacerlo ya que no era necesario tomando en cuenta el look que buscaba, y la velocidad a la que está creciendo este niño. si este no es tu caso, y necesitas mangas más cortas, entonces simplemente corta los puños elásticos y repite los pasos 7 y 8 en las mangas.

¡¡¡C´est fini!!!

Tuesday, May 3, 2011

Little Dude Jeans : Recycle Fashion


¡Ayer mi mamá me recicló un par de jeans!


Click HERE to see the tutorial

Has click AQUI para ver el tutorial


LOVE TO SHARE:


Somewhat Simple


Craft Couture

Little Dude Recycle Fashion / Reciclado Fashion para el Mini-Macho

Presents:
Presenta:
Sloppy Jeans Tute
Tutorial Fachoso para Mezclillas

How to make mini man jeans from mama´s jeans:
this tute is good for 8-11 year old boys, depending on the size of the mama and the size of the mini-papa

Can also be used to recycle older bro´s pants for baby bro (or sis)

mo crear mezclillas para el mini-macho de mezclillas de mamá:
este tutorial sirve para niños de 8-11 años, dependiendo de la talla del chamako, así como la talla de la mamá

(también se puede usar para reciclar mezclillas del hermano mayor para el o la más peque!)

step 1:
Mom jeans (even though it´s not absolutely necessary, depending on kiddo´s age, the higher the waist line the longer the crotch length, which is what makes the difference between pants for girls and pants for boys, crotch length. So the higher the better.)

paso 1:

Mezclillas de mamá (aunque no es absolutamente necesario, dependiendo de la edad del chamako, cuan más alto sea el corte de la cintura del pantalón, más largo será el tiro del pantalón ya reciclado. Esto es lo que hace la diferencia entre el pantalón del niño y la niña, el tiro. Así que cuánto más alto el corte, mejor)


paso 2:
voltear pantalón

step 2:


step 3: Place kiddo´s favorite oldies on top, lining up the center of both pants (top to bottom).

paso 3: Coloca los pantalones viejitos más queridos del chamako encima, alineando el centro de ambos pantalones (empezando de arriba hacia abajo)


paso 4:
Cortar a aproximadamente 5 cm de la bastilla de pantalón viejo

step 4:


paso 5: Cortar el largo exterior del pantalón a aprox. 5 cm del borde del pantalón viejo de SOLO UN LADO

step 5: cut on only ONE pant leg. Leave the other one as it is.


BEWARE:
Too tight is neither comfortable nor cool. So make sure you stretch out the old pant´s waistline (if it has an elastic waistline) BEFORE cutting all the way to the top. You can also measure your little dude´s hips and cut, respecting this measurement + 2 inches on each side)

CUIDADO:
Demaciado apretado no es ni cómodo, ni "cool". Así que antes de cortar hasta arriba, asegúrate que el pantalón viejo esté bien estirado de la cintura, si tiene elástico. Si no, toma las medidas de la cadera de tu chamako (sumándole 5 cm por lado) y respeta esta medida para terminar de cortar.

Step 6: make sure you´re using a needle for extra thick fabric (no. 18 (110) Singer needles work great). Sew from the bottom of the leg all the way to the top. Do this twice, just to make sure they´ll survive boy play. Zig zag the edge. Make them comfy. You´re going to have a lot of stiff, extra fabric at the waist line, so fold over and sew this down to where kiddo´s hips would end.

Paso 6: Usa agujas para tela super gruesa (no. 18 (110) de Singer funcionan bien). Cose desde la parte inferior de la pierna, hasta arriba. Repite este paso para asegurar que el pantalón sobreviva al juego rudo. Cosela orilla en zig-zag. ¡Que sean cómodos! Vas a tener un montón de tela gruesa e incómoda en la cintura del pantalón. Dobla la tela y cose encima, hasta donde terminarían las caderas del chamako.


step 7: Fold jeans over, pulling out the crotch and lining up the center. Take your time to do this well. Then repeat steps 4-6 (WITHOUT GIVING IT THOSE EXTRA 2 INCHES). Cut close to other pant leg.

paso 7: Doble los jeans, jalando el tiro hacia afuera y alineando bien el centro. Toma tu tiempo para hacer esto de manera exacta. Después repite pasos 4 a 6 (SIN DARLE LOS 5 CM EXTRA). Corta cerca a la otra pierna del pantalón.


Step 8: Fold over and sew the hem.

paso 8: Dobla dos veces y cose la bastilla del pantalón.


step 9: CELEBRATE!

paso 9: ¡CELEBRA!


NOW TRY STEALING A PAIR OF DAD´S PANTS AND INVENT SOMETHING FOR KIDDO OR MOM! DON´T FORGET TO SHARE!

¡AHORA TRATEN DE ROBARLE UNOS PANTALONES A PAPÁ E INVENTEN ALGO PARA CHAMAKO O PARA MAMÁ! ¡NO OLVIDEN ENSEÑARMELO!

Big Abrazo! Clau

HAPPY 2 BE SHARING AT:

Monday, July 26, 2010

RAINY DAY BOOTS REFAB / REMODELANDO BOTAS DE LLUVIA

These are what in Mexico we call botas de jardinero (gardener boots). Not the most stylish thing that can be seen on your feet, but boy do they keep em´dry! These are Giaco´s muddy gardener boots before the refab.


Estas son lo que en México llamamos botas de jardinero. No son la cosa más estética que puedes traer en los pies, pero eso si, ¡secos los mantiene! Estas son las lodosas botas de jardinero de Giaco antes de la remodelada.


All I did was cut the top off. They are WAY too long for a little man to be runnin´around in. Plus they are suuuper easy to cut. Just put them on (yourself or your little person, depends on who´s getting the refab) and draw a line where they feel the most comfy (on only 1 boot). Take them off, measure from the ground to where the line is, and repeat on the other boot. Cut away!

Todo lo que hice fue cortar la parte de arriba. Son demaciado largas para que un chamaquit@ ande corriendo por ahí. Además, es super fácil cortarlos. Solo pónselos (o pontelos tu si eres el beneficiario de la remodelada) y dibuja una línea donde los sientas más cómodos (en solo 1 bota). Quítaselos, mide del piso hasta la línea y repite la medida y el trazo en la otra bota. ¡A cortar!

They don´t have to be perfect...and I´m not just saying this to make myself feel better about how crooked these ended up. Now you´re going to look for, or buy, a pair of cool lookin´socks...waaaay bigger the foot that will live in the boot (now I just sound plain old weird... hang in there). If this were for a girl, man, I would have gone crrrazy, but my son wanted me to control my need for color and keep it simple.


No tiene que quedar perfecto... y no lo estoy diciendo solo para consolarme por lo chueco que quedaron estos. Ahora vas a buscar o comprar un par de calzetines con estilacho... muuucho más grandes que el pie que habitará la bota (ahora si sueno como loca, tengan paciencia). Si estas botas fueran para nena, hombre, me hubiera vuelto LOCA, peeeero, mi hijo me pidió que contuviera mi necesidad de color. Sencillito y carismático.Turn the sock inside out and slip it into the boot. Hold it down as best you can from the toe area, and pull (sometimes it´s just easier to put the sock on the kid BEFORE the boot). Fold the sock over the top of the boot and send kiddo off to jump in a puddle or something. YAY!


Voltéa el calzetín al reverso y mételo en la bota con una mano. Con la otra fíjalo lo mejor que puedas, apretando la punta de la bota por la parte exterior y retira la mano (o, ponle el calzetín al chamac@, ANTES de ponerle la bota). Doble el calzetín por encima de la parte cortada de la bota y mandal@ a brincar en un charco o algo así. ¡Yupiiii!

Friday, July 2, 2010

Lazy Sunday PJ Tutorial / Tutorial de Pijama de Dominguito Flojo

AS PROMISED:

PORQUE LO PROMETIDO ES DEUDA:

This was a zero expense project for me. I used only things I had hangin´round the house. I chose this fabric thats been lying around for years.

Para mi esto fue un proyecto de cero gasto. Use solo material que ya tenía en casa. Escogí esta tela que he tenido olvidada por años.


Grab a shirt or blouse that still fits kiddo. I didn´t have one so I used a T shirt, which is not the best way to go because of it´s snug fit and it´s stretchy, the PJ fabric is not. I wanted to go loose, comfortable and longer. In case you´re using a t shirt like me, follow instructions as they go. If you´re using a shirt or old PJ´s, then do not cut as far away from the shirt and pants as we T-shirt people have to. Ok. Fold fabric, front facing. Fold kiddo´s shirt or T and place on top, folded sides together.

Toma una camisa o blusa que aún le quede al enan@. Yo no tenía una, asi que usé una playera. Esto no es lo ideal ya que la playera tiene capacidad de estirarse, son más pegaditas y las camisas de pijama no. Yo voto por lo flojo y cómodo para la meme. Si estas utilizando una playera para este proyecto, como yo, sigue las instrucciones como viene en este tutorial. Si vas a utilizar una camisa o pieza de pijama viejo, no cortes tan apartado de la camisa o pantalón como lo he hecho en este tutorial. Ok. Dobla la tela, anverso con anverso. Dobla la playera o camisa del enan@ y coloca encima, juntando los lados doblados.

Cut, following the shape of the shirt, going as far out as necessary to make it a loose fit. Remember sleeping is supposed to be comfortable! I went further down cause I like the longer look ´cause this PJ design has an Oriental feel to it. Be sure to curve the arm hole in properly.

Corta siguiendo la forma de la playera, alejándote tanto como sea necesario del borde para hacerlo holgado. ¡Recuerden que dormir debería ser sinónimo de cómodo! Me fui bastante mas largo que la playera porque me gusta el estilo oriental que esto le da. Asegúrate de curvear bien la apertura del brazo.
You should now have one of these. Place this piece of fabric onto the larger fabric, once again, folded sides together. Pin and cut following the edges as closely as posible.

Ahora deberás tener una pieza como esta. Coloca esta pieza de tela encima de la tela grande, uniendo, una vez más, por las orillas dobladas. Asegura con alfiler y corta, ahora si, lo más cerca al borde posible.
You now have two

Ahora tienes dos

Cut the neck of only ONE of the pieces, swooping down a bit. Once you´re done, this piece will be the FRONT.

Corta el cuello de solo UNA de las piezas, haciéndolo un poco más pronunciado. Este va a ser el FRENTE de la camisa.Now cut down the middle of the FRONT piece

Ahora corta por la mitad de todo el largo de la pieza FRONTALNow you should have 3 pieces

Ahora deberás tener 3 piezas

For the sleeves, take the back piece and place the arm hole curve on top of the fabric, fronts facing, and leaving the fold on the TOP part of the armhole. Now trace the curve onto the fabric.

Para las mangas, toma la pieza de la espalda y coloca la curva para la manga encima de la tela, una vez mas , anverso con anverso, dejando el doblés del lado SUPERIOR de la pieza de la espalda.

Like so:

Así:
This is what it will look like. Pay attention to where the fold is.
Así es como se deberá ver. Presta atención a donde queda el doblés.

Now use the shirt or T to help you get an idea of what the sleeve should look like. Remember to make it wider in case of using a snug fit T. The curve should go where the sleeve meets the bodice, and the fold should go on top. Same thing goes for long sleeved shirts.

Ahora usa la playera/camisa para darte una idea de cómo debe ser la forma de una manga. Recuerda hacerlo bastante más ancho en caso de estar usando una playera entallada como guía. La curva debe ir donde la manga se encuentra con el cuerpo de la camisa, y el doblés en la parte superior. lo mismo aplica para una camisa de manga larga.

This is what you should have after tracing. Cut out. Use pins...please!

Esto es lo que deberás tener después de trazar. ¡Porfavor...usen alfileres!The pointy part on the upper left corner is a no-no. I ended up cutting it off...you´ll see...

La parte puntiaguda de la esquina suerior izquierda esta mal, mala mamá. Terminé cortándolo... ya verán...

See?
Pin down to fabric once again. Remember to match folds. Cut so that you now have 2 sleeves. Set aside for just a moment.

¿Ven?
Fija con alfileres a la tela, una vez más. Recuerda juntar los dobleses. Corta para ahora tener 2 mangas. Dejenlo a un lado por un momento.

For the bodice, place the 2 smaller pieces (front) on top of the larger piece (back), fronts facing and sew only the 2 sides and shoulders. Zig-zag.

Para el cuerpo de la camisa, coloca las dos piezas mas pequeñas (frente) encima de la pieza amplia (espalda), anverso con anverso y coce solo los dos lados y los hombros. Remata con el zig zag.

Now back to the sleeves: Sew closed the sides opposite of the fold. Zig zag.

Ahora de regreso a las mangas: une cociendo los dos lados opuestos al doblés. Rematando en zig zag.
Fold over and sew the hem of the sleeve.

Coce el doblés de la manga (doblando dos veces y cociendo)

This is what this should look like:

Así se deberá ver:

Ok, here comes the hard part (at least it is for muá). Slip sleeve into armhole and pin. Be sure to match the seams of the side of the shirt with the one on the sleeve. Remember to check that the right sides of the fabric are facing, and that the sleeve isn´t too tight or loose for the armhole. After you´ve done all your checking, sew together. Zig zag.

Ok. Aquí viene lo dificil (o por lo menos lo es para mi). Desliza la manga por la apertura del brazo y sujeta con alfileres. Asegurate de empalmar las costuras de la manga con el cuerpo de la camisa. Recuerda checar que las telas se encuentren anverso con anverso, y que las mangas no estén demaciado apretadas o flojas para la apertura del brazo o manga. Después de haber asegurado todo, coce y termina con zig zag.

Funny looking little thing. I think I made the shoulder slant waaaaay to slanty. Oh well, let us continue...

Se ve chistosito, ¿no? Creo que hice la inclinación del hombro demaciado inclinado. Bueeeeno, continuemos...I used contrasting color bias tape for the neck. Pin and sew.

Use biés de un color contrastante para terminar el borde del cuello. Fija con alfilers y coce.
Now this part started out as a solution to a mistake with my first Lazy Sunday PJ´s. But I liked it and repeated it here. Cut out a piece of contrasting fabric, a bit shorter then the length of the shirt. Fold over and sew 3 sides. Place over one of the front sides of the shirt, fronts facing, and leaving that extra space left over (cause the smaller fabric isn´t as long as the shirt) on the top. Sew on, as if extending the fabric.
Ahora esta parte comenzó como la solución para un problema que había surgido con el pijama 1. Me gustó y decidí repetirlo con este pijamita también. Corta una pieza de tela contrastante, un poco más corto que el largo de la parte frontel de la camisa. Dobla dos veces y coce 3 lados de esta pieza. Coloca encima de uno de los lados de la parte frontal de la camisa, anverso con anverso. Deja la parte corta de la pieza de tela (porque rcuerden que es mas corta que el largo de la camisa) en la parte superior. Coce uniendo las dos piezas , como si estuvieras extendiendo una solapa.
I looked for different buttons, no one cared for anymore and put them to use. Place the buttons on the shirt so as to imagine where you would like them to sit...

Busqué distintos botones que ya nadie quería y los puse a trabajar. Coloca los botones encima de la camisa, en el lugar donde quieres que queden...

Lift the button and with chalk, trace a little line where you want the button hole to go.

Levanta el botón y traza con gis una pequeña linea donde quieres que vaya el ojál.Repeat with each button.

Repite con cada botón.

After finishing the button holes, close the shirt the way it would fit on kiddo and trace where the button hole lies. This way you know exactly where to sew the botton on. And now....SEW ON THE BUTTONS AND ON TO THE PANTS!

Después de terminar los ojales, cierra la camisa como si estuviera ya sobre el enan@ y traza a través de los ojales donde van a ir los botones. Ahora...¡COCE LOS BOTONES Y SIGAMOS CON LOS PANTALONES!

PANTS: Take an old pair of pants, fold over place on the fabric (right sides facing) with straight side of pants on the fold of the fabric.

PANTALONES: Toma unos pants o pantalones viejos y coloca sobre la tela (anverso con anverso) con el lado recto del pantalón sobre el doblés de la tela.

Trace and cut leaving lots of extra comfy space. I left the legs especially long so as to not have to give them away in 2 months. Kids grow SO fast!
Traza y corta, dejando bastante epacio para la comodidad. Dejé las piernas especialmente largas para no tener que regalar el pijama dentro de solo 2 meses. ¡Los chamacos crecen TAN rápido!
Take the first piece we just cut, turn over and use as guide to cut out the other side. This time cut as close as posible to edge.
Toma la primera pieza que cortaste, volteala y utilízala como guía para cortar el otro lado. Esta vez corta tan pegado al borde como sea posible.


Now you´ll have to pieces that look like this
Ahora tendrás dos piezas que se ven asíExtend those 2 pieces and place one over the other fronts facing. Pin and sew the curvy part of the fabric. I usually go over twice so as to give the crotch area more resistance...you know..."playproof".

Extiende esas dos piezas y colocalas una sobre otra, anverso con anverso. Fija con alfileres y coce siguiéndo solo la parte curveada de la tela. Normalmente repaso esta costura dos veces para hacer que el pantalón sea más resistente.

Once this is done, "open" the pants and place in the following position. Now pin and sew from the base of one leg all the way over to the other, making sure the crotch seams match.
Una vez hecho esto, "abre" los pantalones y colocalos en la siguiente posición. Ahora fija con alfileres y coce desde la base de una de las piernas hasta el otro extremo, asegurándote que las costuras de tiro coincídan.


Fold over twice at the waist and pin. I left a lot of space because I like using wide elastic for comfort .
Dobla dos veces el área de la cintura. Yo hice un doblés amplio ya que me gusta usar elástico ancho para mayor comodidad.

Sew all around, leaving a small space through which you will pull the elastic through with a safety pin. Once this is done, sew closed.
Coce todo alrededor del borde del doblés, dejando un espacio abierto por donde pasará el elástico fijado a un seguro (imperdible, etc). Una vez terminado esto, cierra la apertura cociendo.
Sew pant hem. This is what I mean by leaving a lot of extra "growing room" .
Coce la bastilla del pantalón. A esto me refiero con dejar extra espacio para crecer.


BABY LOVES SUNDAYS IN BED WITH MOMMY!
¡NENA AMA LOS DOMINGOS EN CAMA CON MAMI!